
Adding a New Page
For ease of use and consistency, several templates have been designed to help editors add needed pages.
1. Sign into Wix
Login information will be provided to you by the site administrator.
2. Select a Template
In the Pages Menu select the desired template. Click on the circle with the "..." on the right of the template name and select "Duplicate" from the choices given. Current pages that have the look and style of the new page to be created can also be duplicated.


3. Change the Name of the Page
Change the name of the new page. The page should automatically display with the name field editable. If it doesn't or you want to revise the name of the page, click on the "..." again and select "Rename" to give the page a new name.
IMPORTANT: Page names should be one to three words and should make sense. Do not name pages "Page 1", "Page 2", etc.
4. Changing the Page Slug
It is important that each page has a unique SEO name. This is what users will see in the top location bar of their browser when they viewing the page. Because the new page was copied from a template, the default SOE name will be /copy-[page name from copied page].
To change the SEO page name:
-
Select "..." next to the page name and then choose "Settings" from the menu that appears.
-
Click on the last tab labeled "SEO(Google)" and scroll down.
-
Select the existing page name. Type in a new one name, and hit return. A green check mark should appear.
-
When you are finished click the "Done" button.
IMPORTANT: When using more than one word for page name place a hyphen between the words. For example, the text should read, "sample-page" not "sample page". Also use lowercase letters only, no symbols (commas, periods, exclamation points, etc.), and no numbers.


5. Placing the Page in the Proper Menu Location
The main menu consists of seven main headings. They are Home, About Us, Programs, eNews, Special Interest, Fundraising, and Partners.
To place move a page, click on new page and drag it under the heading where it should appear in the main menu.
6. Add Content and Edit Existing Page Content
Most Templates have a base layout with placeholder headings and text boxes. IWhen adding content and making edits be sure to:
-
Double-check typeface sizes and line height (see Website Styles for more information)
-
Use proper margins (see Pages Overview > Areas of the Page)
-
Size and reset all images as needed (see Other Page Elements)
-
Check layout for spacing
-
Allow approximately 75 pixels (.75") between the bottom content and the footer

7. Save Changes
Click "Save" in the top right on the Wix interface. While Wix does have an autosave feature, save often to minimize the risk of losing any work.
8. Preview Changes
Click "Preview" in the upper right corner of the Wix interface to review changes. Make sure all content is displayed properly and there is the right amount of spacing between elements, etc. If additional changes are needed, click "Back to Editor" in the top right.


9. Edit the Mobile View
To ensure proper viewing on mobile devices the mobile view must be edited. New elements such as images or new text objects may need to be moved to the proper location or order.
IMPORTANT: Text blocks and images should be 300 pixels wide and should be centered in the mobile view. Use the measurements panel to make changes.
Save changes.
NOTE: Leave a comfortable space between the content and the footer.
NOTE: It is easier to adjust the mobile view if done as content is added. Doing this minimizes moving content overall.


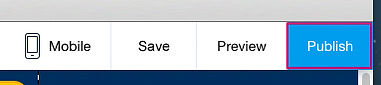
10. Publish the Page
Publish the page to make changes visible. Click "Publish" in the upper right.
IMPORTANT: Publishing at any time, on any page of the website will affect the overall visibility of all web pages.